Introduction
Creating a website involves multiple stages, from brainstorming and planning to designing and launching. One of the most critical steps in this process is wireframing. Whether you are a web designer, developer, or business owner, understanding how to create a wireframe for a website is essential to ensure a well-structured, user-friendly design.
Wireframes serve as the blueprint of your website, helping you visualize the layout, structure, and functionality before diving into the actual design. This comprehensive guide will walk you through the process of creating wireframes, covering everything from basic concepts to advanced techniques.
What is a Wireframe?
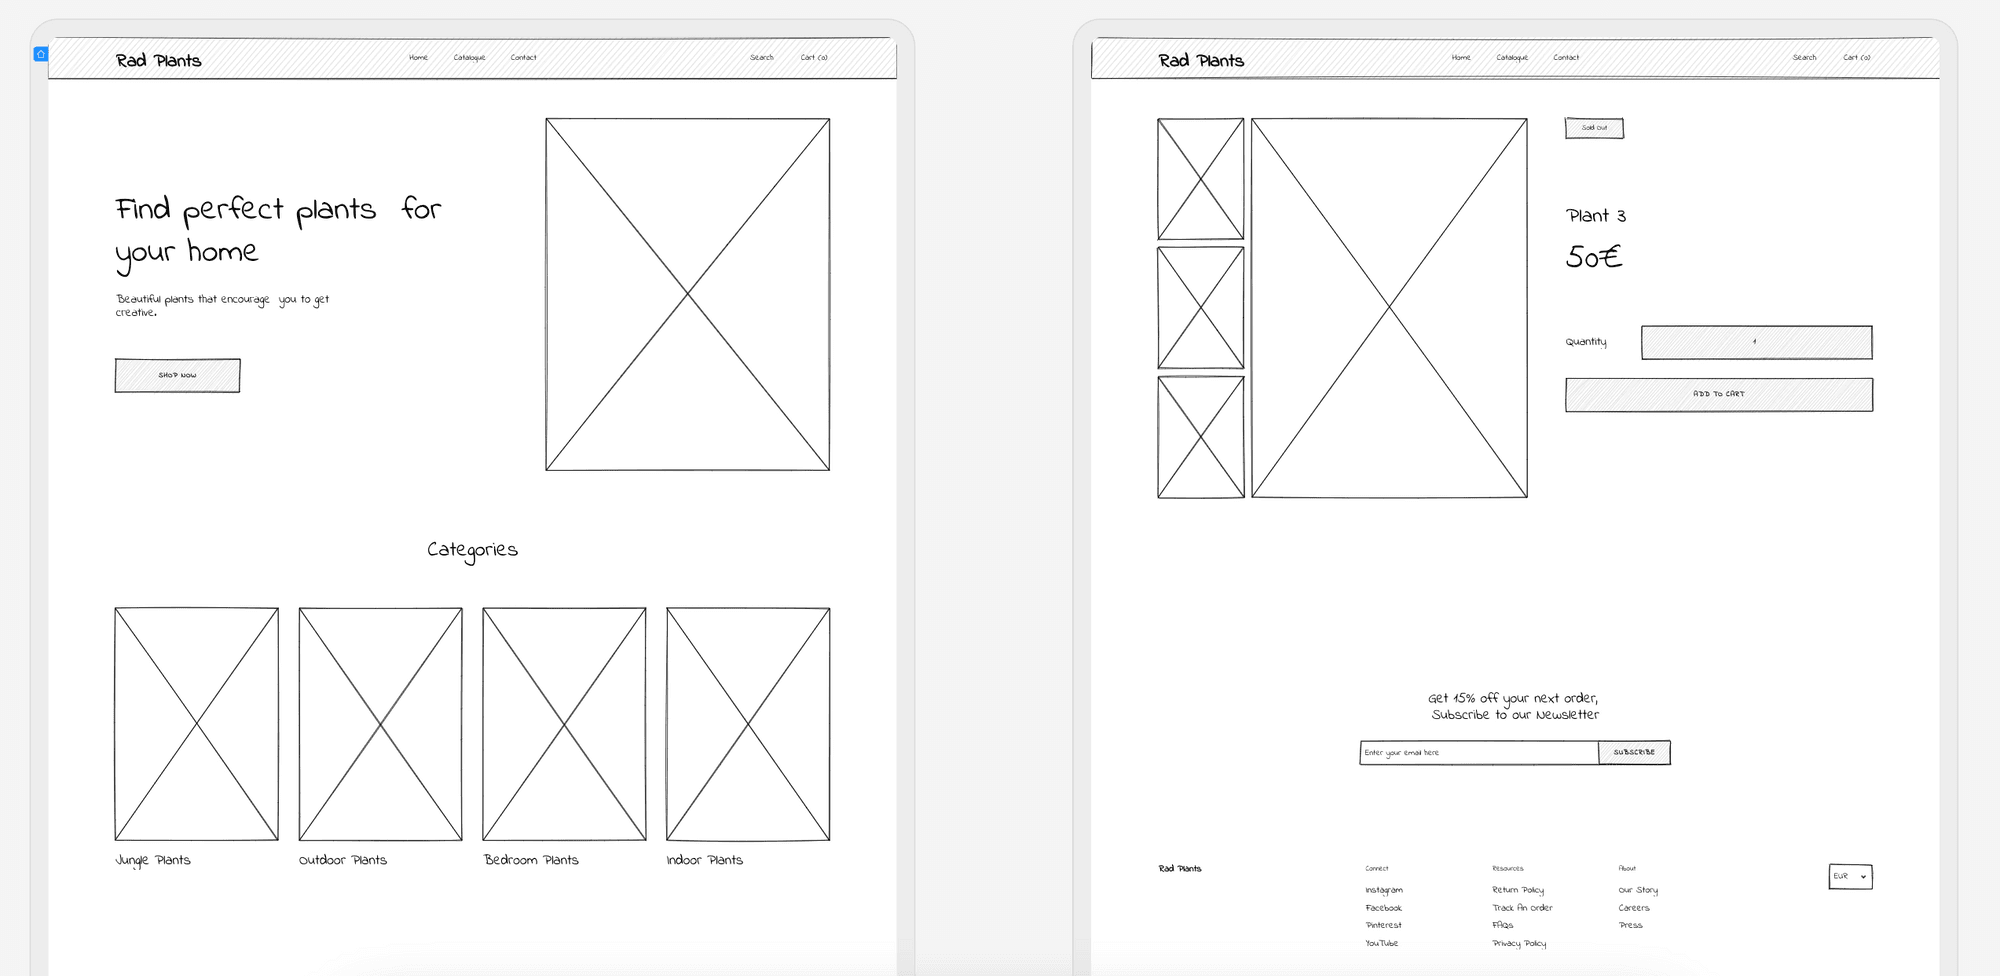
A wireframe is a visual representation of a website’s layout, illustrating the placement of elements like headers, footers, navigation, images, text, and call-to-actions (CTAs). It serves as a skeletal structure or blueprint of a website, providing clarity on how content and functionality will be arranged.
Why Wireframes Are Important
- Visual Clarity: Helps stakeholders understand the design structure.
- User Experience (UX): Facilitates planning for an intuitive user journey.
- Content Organization: Ensures the proper placement of text, visuals, and CTAs.
- Efficiency: Saves time and resources by minimizing design errors.
- Collaboration: Provides a common reference point for designers, developers, and clients.
Types of Wireframes
Understanding the different types of wireframes is essential before diving into the process.
1. Low-Fidelity Wireframes
- Simplistic and basic.
- Focuses on structure and functionality without design details.
- Often created with pen and paper or simple digital tools.
2. Mid-Fidelity Wireframes
- More detailed than low-fidelity wireframes.
- Includes placeholder text, basic shapes, and a rough layout.
- Useful for presenting ideas to stakeholders.
3. High-Fidelity Wireframes
- Detailed and polished.
- Includes actual content, colors, fonts, and visuals.
- Often created with advanced tools like Sketch, Figma, or Adobe XD.
How to Create a Wireframe for a Website: Step-by-Step Guide
Step 1: Define Your Objectives
Before creating a wireframe, it is essential to understand your website’s purpose and target audience.
Key Considerations:
- What is the primary goal of your website? (e.g., sales, information, portfolio)
- Who is your target audience? (e.g., age, interests, demographics)
- What features do you want to include? (e.g., login system, contact forms, e-commerce functionality)
Step 2: Research and Gather Inspiration
Look at existing websites in your niche to gather inspiration. Identify what works well and what doesn’t.
Research Tips:
- Analyze competitors’ websites.
- Study design trends in your industry.
- Take notes on effective layouts and functionalities.
Step 3: Sketch Your Ideas
Start with low-fidelity wireframes to get your ideas on paper or a digital platform.
Tools for Sketching:
- Pen and Paper
- Whiteboard
- Digital Tools: Balsamiq, Sketch, Figma
Step 4: Choose Your Wireframing Tool
Select a tool that fits your skill level and project requirements.
Popular Wireframing Tools:
- Balsamiq: Great for low-fidelity wireframes.
- Figma: Versatile tool with collaboration features.
- Adobe XD: Ideal for high-fidelity designs.
- Sketch: Preferred by professionals for detailed wireframes.
Step 5: Create a Layout Structure
Begin designing your wireframe by organizing the key elements.
Common Elements to Include:
- Header: Logo, navigation menu, search bar.
- Content Sections: Text blocks, images, videos.
- Call-to-Actions (CTAs): Buttons, links.
- Footer: Contact information, social media links, copyright notice.
Step 6: Add Functionality and User Flow
Ensure your wireframe provides a seamless user experience by defining the user journey.
Considerations:
- Define clickable elements.
- Visualize navigation paths.
- Plan for different screen sizes (responsive design).
Step 7: Review and Revise
Before moving to the next stage, review your wireframe and gather feedback from stakeholders.
Tips for Review:
- Conduct user testing with potential users.
- Gather feedback from designers, developers, and clients.
- Make revisions as needed.
Step 8: Convert Wireframes to High-Fidelity Designs (Optional)
Once your wireframe is approved, you can move on to creating a high-fidelity design with visuals, colors, fonts, and other design elements.
Best Practices for Creating Wireframes
- Keep It Simple: Avoid overcomplicating your wireframe with unnecessary details.
- Use Consistent Elements: Maintain consistency with buttons, headings, and navigation menus.
- Focus on Usability: Prioritize user experience over aesthetic design during wireframing.
- Gather Feedback Early: Involve stakeholders during the wireframing phase.
- Document Your Process: Keep track of changes and iterations for future reference.
Conclusion
Creating a wireframe is a crucial step in the web development process. It allows you to visualize your website’s layout, enhance user experience, and streamline the design process. Understanding how to create a wireframe for a website will save you time, reduce errors, and improve communication with stakeholders.
By following this comprehensive guide, you can create effective wireframes that serve as a strong foundation for your website. Start designing your wireframe today and set your website project up for success.


